OpenAPI specification generation
Strapi provides a command-line tool to generate OpenAPI specifications for your applications.
The CLI tool automatically creates comprehensive API documentation that describes all available endpoints, parameters, and response formats in your Strapi application's Content API. Among the possible use cases, the generated specification can then be integrated into documentation tools like Swagger UI .
The OpenAPI generation feature is currently experimental. Its behavior and output might change in future releases without following semantic versioning. For additional information and context, please refer to the Strapi Contributor Docs .
Generating an OpenAPI specification
The OpenAPI generation tool is included with Strapi core and doesn't require additional installation. You can use it directly from the command line in any Strapi project to generate comprehensive API documentation.
required metadataThe Admin panel can mark inner fields on a component as required, yet the generated OpenAPI file may still skip a required entry for those scalars. The parent object (for instance a component inside a dynamic zone) might list required while the nested properties do not. There is more background in GitHub issue #2236. Client generators that trust the raw schema alone can therefore emit types that look looser than what Strapi actually enforces.
This area is still experimental, same as the warning banner at the top of the page, so keep validating nested payloads in application code or with the REST validation helpers from the controllers guide instead of assuming every Admin rule is mirrored in the exported JSON schema yet.
CLI usage
Executing the command without any arguments will generate a specification.json file at the root of your Strapi folder project:
- Yarn
- NPM
yarn strapi openapi generate
npm run strapi openapi generate
You can also pass an optional --output argument to specify the path and filename, as in the following example:
- Yarn
- NPM
yarn strapi openapi generate --output ./docs/api-spec.json
npm run strapi openapi generate -- --output ./docs/api-spec.json
Specification structure and content
The generated OpenAPI specification follows the OpenAPI 3.1.0 standard and could look like in the following shortened example:
The generated OpenAPI specification includes all available API endpoints in your Strapi application, and information about these endpoints, such as the following:
- CRUD operations for all content types
- Custom API routes defined in your application
- Authentication endpoints for user management
- File upload endpoints for media handling
- Plugin endpoints from installed plugins
Serving the specification over HTTP
Strapi can serve the generated OpenAPI specification as a live HTTP endpoint. Serving specifications over HTTP removes the need to regenerate a static file after each content-type change. Both the Content API and Admin API specifications can be served independently.
Both endpoints are disabled by default. Enable them in the server configuration file.
Configuration
Add an openapi key to the server configuration to enable 1 or both endpoints:
- JavaScript
- TypeScript
module.exports = ({ env }) => ({
  host: env('HOST', '0.0.0.0'),
  port: env.int('PORT', 1337),
  openapi: {
    'content-api': {
      enabled: true,
      route: {
        path: '/openapi.json',
      },
      access: {
        mode: 'public',
      },
      cache: {
        enabled: true,
        maxAgeMs: 60000,
        filePath: '.strapi/openapi/content-api.json',
      },
    },
    admin: {
      enabled: true,
      route: {
        path: '/openapi.json',
      },
      access: {
        mode: 'authenticated',
        roles: ['strapi-super-admin'],
      },
      cache: {
        enabled: true,
        maxAgeMs: 60000,
        filePath: '.strapi/openapi/admin.json',
      },
    },
  },
});
export default ({ env }) => ({
  host: env('HOST', '0.0.0.0'),
  port: env.int('PORT', 1337),
  openapi: {
    'content-api': {
      enabled: true,
      route: {
        path: '/openapi.json',
      },
      access: {
        mode: 'public',
      },
      cache: {
        enabled: true,
        maxAgeMs: 60000,
        filePath: '.strapi/openapi/content-api.json',
      },
    },
    admin: {
      enabled: true,
      route: {
        path: '/openapi.json',
      },
      access: {
        mode: 'authenticated',
        roles: ['strapi-super-admin'],
      },
      cache: {
        enabled: true,
        maxAgeMs: 60000,
        filePath: '.strapi/openapi/admin.json',
      },
    },
  },
});
The content-api endpoint is served under the REST API prefix (/api by default). The full URL is http://localhost:1337/api/openapi.json. The admin endpoint is served under the admin path (/admin by default). The full URL is http://localhost:1337/admin/openapi.json.
Both endpoints must resolve to different full paths. If the content-api and admin endpoints resolve to the same URL, Strapi throws an error at startup.
Available options
Each endpoint (content-api and admin) accepts the following options:
| Option | Type | Default | Description |
|---|---|---|---|
enabled | Boolean | false | Enables the HTTP endpoint. |
route.path | String | '/openapi.json' | Path where the specification is served. Appended to the endpoint prefix (/api for content-api, /admin for admin). |
access.mode | String | 'authenticated' | Access control mode. Accepts 'public' or 'authenticated'. |
access.roles | Array of strings | [] | Scopes required to access the endpoint. Only used when access.mode is 'authenticated'. If omitted, any authenticated user or token is allowed. |
cache.enabled | Boolean | true | Enables file-based caching of the generated specification. |
cache.maxAgeMs | Number | 60000 | Maximum age of the cache file in milliseconds before regeneration. |
cache.filePath | String | '.strapi/openapi/<type>.json' | File path for the cache file. Relative paths are resolved from the application root. |
Access control
The access.mode option controls who can reach the endpoint:
'public': No authentication required. Anyone can fetch the specification.'authenticated': Requires a valid authentication token. This is the default mode.
When using 'authenticated' mode, you can restrict access to specific scopes with the access.roles array. If access.roles is omitted or empty, any authenticated user or API token is allowed.
For production environments, use 'authenticated' mode with specific roles to limit who can access the API specification.
Integrating with Swagger UI
If you enabled the HTTP endpoint, you can point Swagger UI directly at the live URL (e.g., http://localhost:1337/api/openapi.json) instead of generating a static file. Skip step 1 below and use the endpoint URL as the url value in step 3.
With the following steps you can quickly generate a Swagger UI-compatible page:
-
Generate a specification:
- Yarn
- NPM
yarn strapi openapi generate --output ./public/swagger-spec.jsonnpm run strapi openapi generate -- --output ./public/swagger-spec.json -
Update the
/config/middlewares.jsconfiguration file with the following code:- JavaScript
- TypeScript
/config/middlewares.jsmodule.exports = [
'strapi::logger',
'strapi::errors',
{
name: 'strapi::security',
config: {
contentSecurityPolicy: {
useDefaults: true,
directives: {
'script-src': ["'self'", "'unsafe-inline'", 'https://unpkg.com'],
'style-src': ["'self'", "'unsafe-inline'", 'https://unpkg.com'],
'connect-src': ["'self'", 'https:'],
'img-src': ["'self'", 'data:', 'blob:', 'https:'],
'media-src': ["'self'", 'data:', 'blob:'],
upgradeInsecureRequests: null,
},
},
},
},
'strapi::cors',
'strapi::poweredBy',
'strapi::query',
'strapi::body',
'strapi::session',
'strapi::favicon',
'strapi::public',
];/config/middlewares.tsexport default [
'strapi::logger',
'strapi::errors',
{
name: 'strapi::security',
config: {
contentSecurityPolicy: {
useDefaults: true,
directives: {
'script-src': ["'self'", "'unsafe-inline'", 'https://unpkg.com'],
'style-src': ["'self'", "'unsafe-inline'", 'https://unpkg.com'],
'connect-src': ["'self'", 'https:'],
'img-src': ["'self'", 'data:', 'blob:', 'https:'],
'media-src': ["'self'", 'data:', 'blob:'],
upgradeInsecureRequests: null,
},
},
},
},
'strapi::cors',
'strapi::poweredBy',
'strapi::query',
'strapi::body',
'strapi::session',
'strapi::favicon',
'strapi::public',
];This will ensure the Swagger UI display from unpkg.com is not blocked by Strapi's CSP policy handled by the security middleware.
-
Create a
public/openapi.htmlfile in your Strapi project to display the Swagger UI, with the following code:<!DOCTYPE html>
<html>
<head>
<title>API Documentation</title>
<link
rel="stylesheet"
type="text/css"
href="https://unpkg.com/swagger-ui-dist@5.0.0/swagger-ui.css"
/>
</head>
<body>
<div id="swagger-ui"></div>
<script src="https://unpkg.com/swagger-ui-dist@5.0.0/swagger-ui-bundle.js"></script>
<script src="https://unpkg.com/swagger-ui-dist@5.0.0/swagger-ui-standalone-preset.js"></script>
<script>
window.onload = function () {
SwaggerUIBundle({
url: './swagger-spec.json',
dom_id: '#swagger-ui',
presets: [
SwaggerUIBundle.presets.apis,
SwaggerUIStandalonePreset
],
layout: 'StandaloneLayout',
});
};
</script>
</body>
</html> -
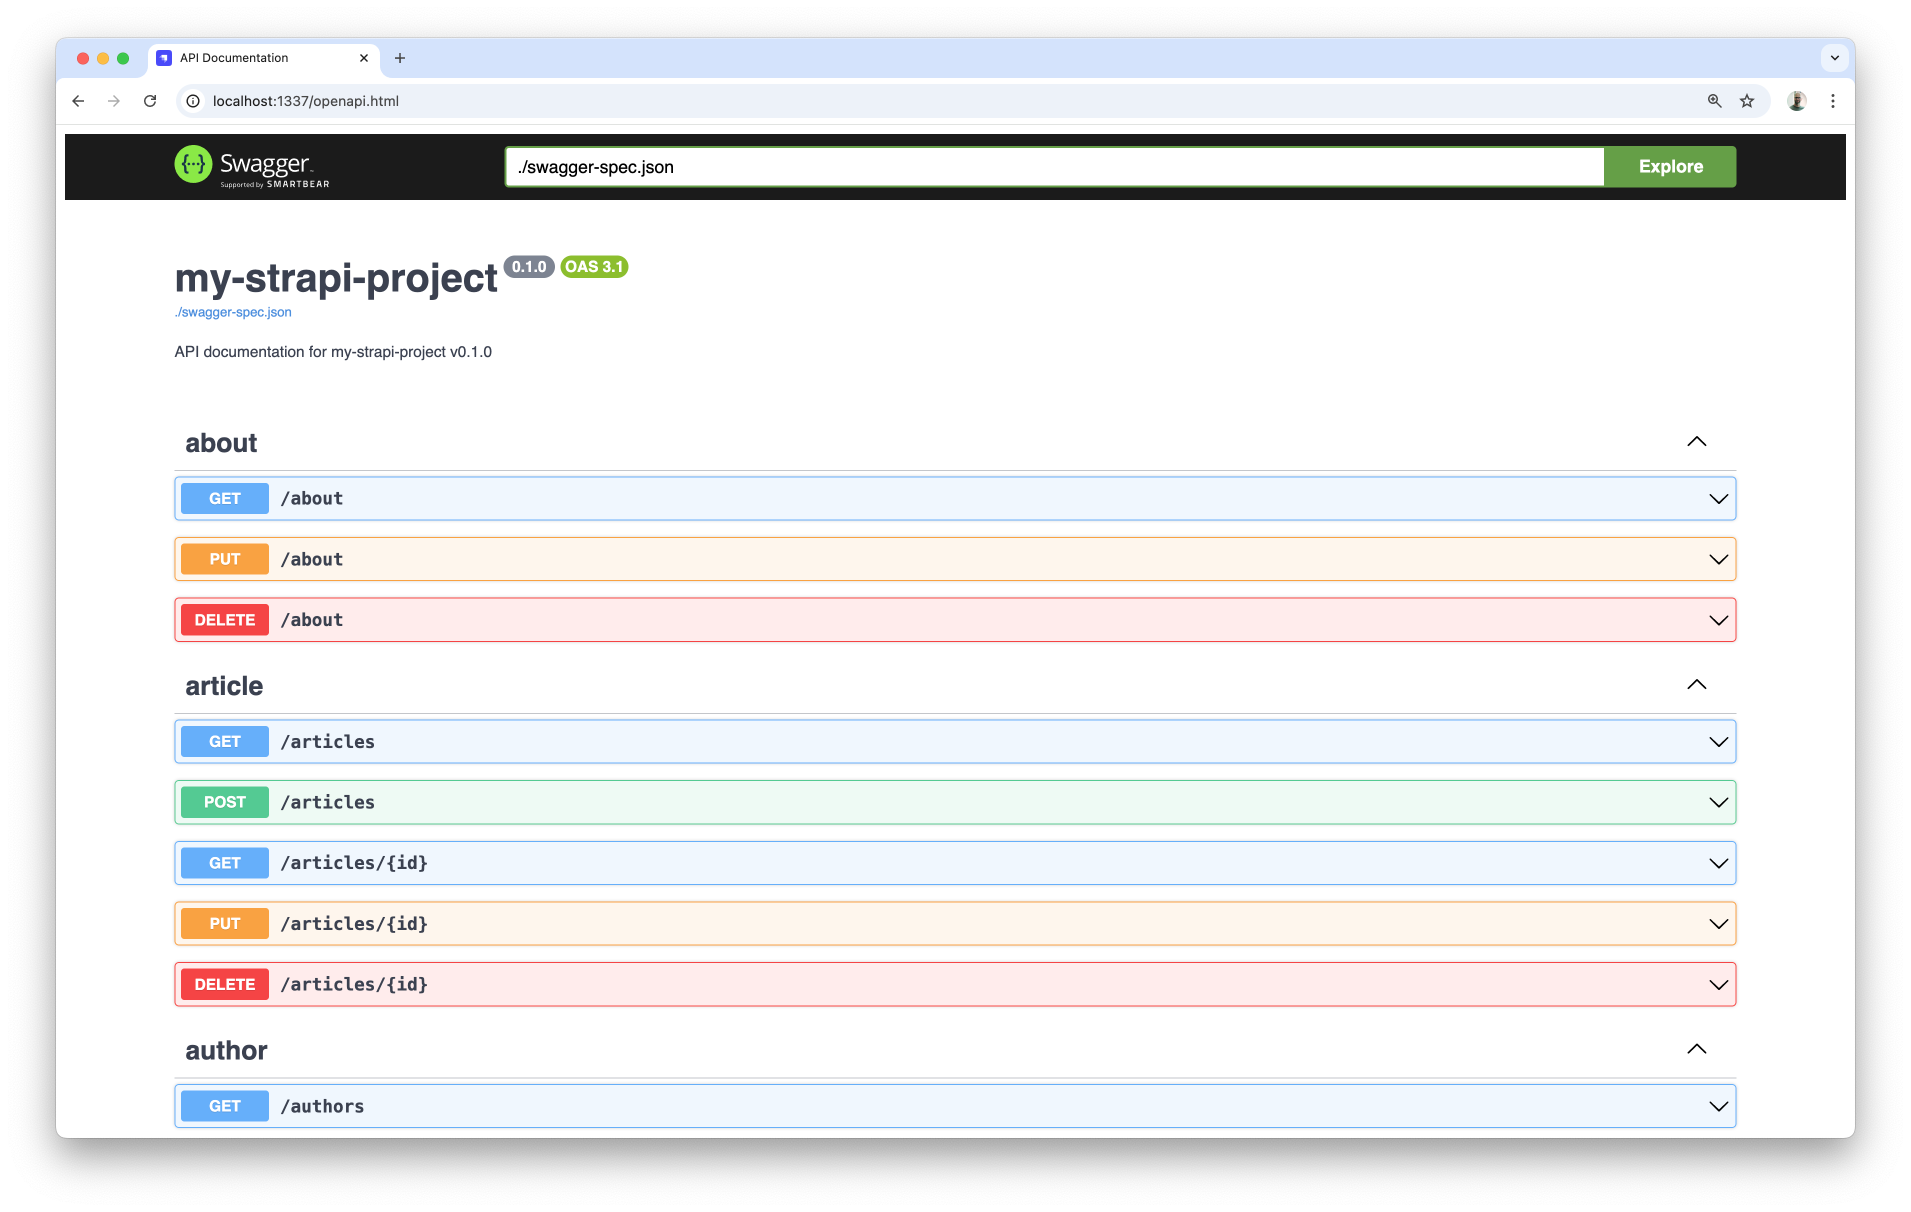
Restart the Strapi server with
yarn developornpm run developand visit the/openapi.htmlpage. The Swagger UI should be displayed: